This blog post tells you how to format a Microsoft Windows (NTFS) hard drive using Xubuntu (Linux).

Introduction
I had removed a 3.5″ EIDE 80GB hard drive from a desktop computer and have now decided to use it as an external storage device connected via USB. Primarily I intend to use it with a laptop running the linux operating system Xubuntu, but I also wanted it to be readily accessible on a Microsoft Operating system.
The Hard Drive details:
– 80GB hd with multiple partitions.
– A 3.5“ hard drive caddy.
Here is what I used:
– Xubuntu 10.10 installed on an old laptop with USB 1.0 connections.
– GParted (downloaded via Xubuntu)
Yes GParted was originally created for the Gnome desktop environment, but it runs smoothly on my xfce based Xubuntu system. I am sure there are any number of partition tools I could of used, but GParted is free and an excellent partition tool.
The hard drive already had multiple partitions, but I wanted one large partition and I didn’t want any of the original data. If I had been worried about the original data from a security standpoint I would of done a ‘boot and nuke’ to erase the data.
NTFS has been commonly used on MS Windows systems since Windows 2000 days, so decided to use that type of partition as Xubuntu and recent Microsoft Windows system will read / write with NTFS.
Installing GParted
From the ‘Applications’ menu I selected ‘Ubuntu Software Centre’, searched for gparted and installed.
Connecting the hard drive
The hard drive was placed in a USB caddy device and then connected to a laptop with Xubuntu. The system automatically mounted the system. I righted-clicked on the desktop icon for the device and selected ‘unmount’. If I had not done this GParted wouldn’t of been able to modify the device.
Using GParted
1. I opened GParted and from the ‘GParted’ menu selected ‘Devices’ and then the id for the external drive. Make sure you select the right device as you could screw up other hard drives.

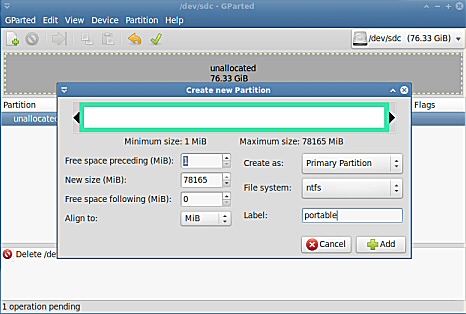
2. I then selected to delete the current partitions, create a new NTFS one and then format. Once you have finished with your selected you need to select the green tick icon at the top to perform the actions.
End Result
GParted is a user-friendly piece of free software and it hardly took any time at all to reconfigure the hard drive.

